
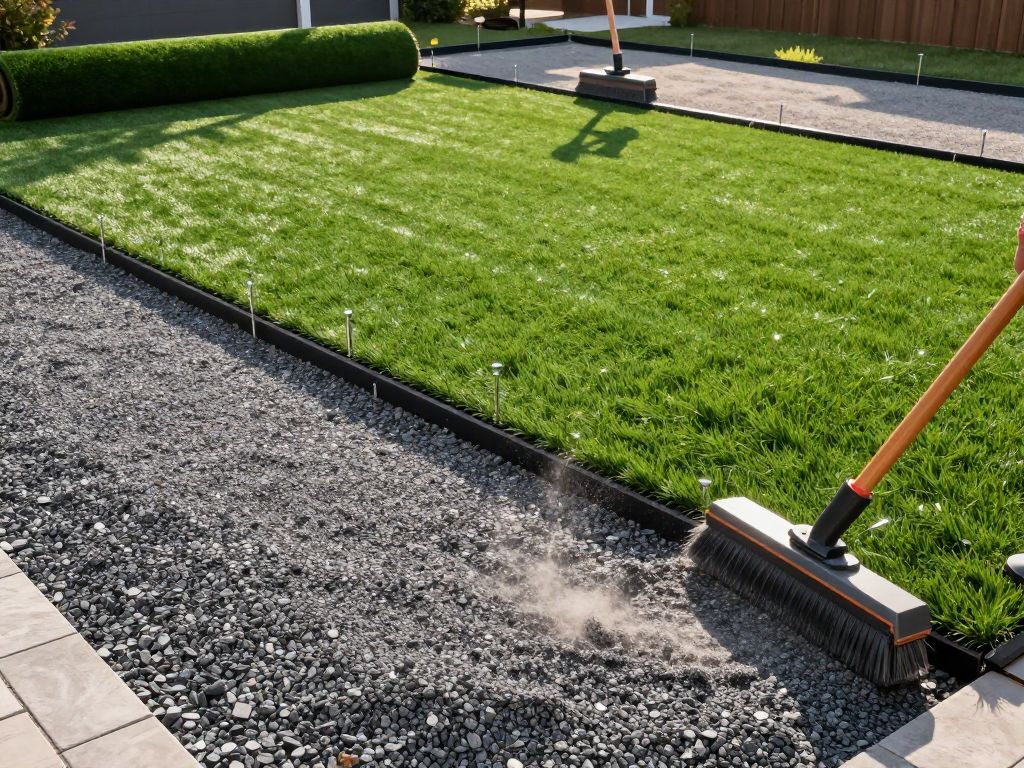
The Definitive Step-by-Step Guide to Artificial Turf Installation
##?
Installing artificial turf is a precise process requiring several critical steps—excavation, proper base preparation (sub-base compaction and leveling), seaming, perimeter securement, and infill application. Correct execution of each step ensures optimal drainage, a professional appearance, and maximum lifespan for your synthetic lawn. For solution-aware homeowners, understanding this installation sequence is key to validating the quality of the project.
2. Deep Dive (Detailed Why and How)
Step 1: Site Assessment and Planning (The Foundation of Success) Before any earth is moved, a precise site assessment is necessary. This involves defining the area, marking utility lines, and calculating material needs. Accurate planning minimizes waste and prevents costly delays.
Step 2: Excavation and Removal The existing grass, sod, or topsoil must be excavated to a depth of 3 to 4 inches below your desired final turf grade. Proper excavation is crucial for accommodating the necessary layers of base material and maintaining correct height relative to existing hardscapes like patios or sidewalks.
Step 3: Defining the Perimeter and Edging The edge of the installation area must be clearly defined and secured, often using materials like bender board, plastic edging, or concrete curbing. This step locks the entire system in place and provides a clean, stable boundary for the turf.
Step 4: Base Preparation (The Sub-Base) A compacted sub-base is the most critical element for drainage and stability. Install 2 to 3 inches of crushed angular gravel (like crushed granite or Class 2 road base). This material is spread, moistened, and compacted using a plate compactor to achieve at least 90% compaction, ensuring a stable, durable foundation that prevents settling.
Step 5: Laying the Final Leveling Layer Add a thin layer (0.5 to 1 inch) of finer material, such as decomposed granite or leveling sand, over the compacted sub-base. This layer must be precisely smoothed and lightly compacted to create a perfect, consistent surface plane that the turf will rest on.
Step 6: Rolling Out the Turf Carefully unroll the synthetic grass over the prepared base, ensuring that all pieces are oriented with the blade direction facing the same way to maintain a uniform color and texture. Allow the turf to rest ("relax") for a few hours to eliminate wrinkles or creases.
Step 7: Seaming and Trimming Once positioned, rough-cut the perimeter, leaving a small excess. If multiple rolls are required, join them by trimming the selvage (the factory edge without fibers) and bonding the rolls together using specialized seam tape and moisture-curing polyurethane adhesive. Precision in seaming is vital for an invisible joint.
Step 8: Securing the Perimeter Anchor the edges of the turf every 3 to 6 inches using 4- to 6-inch galvanized nails or staples, driving them deep enough to disappear into the thatch layer. Additional nails may be added throughout the field to secure the middle sections.
Step 9: Infill Application Apply the recommended infill material (usually rounded silica sand or specialized antimicrobial infill) evenly across the turf using a drop spreader. Infill is necessary to weigh down the turf, protect the backing, support the blades, and aid in cooling.
Step 10: Final Grooming Use a power broom or stiff synthetic brush to brush the infill down into the base of the turf and pull the fibers upright. This step finalizes the installation, resulting in a lush, natural-looking finish.
3. Quick Reference (Bulleted Key Takeaways)
- Base is Paramount: Proper excavation and compaction of the sub-base (crushed granite) is non-negotiable for longevity and drainage.
- Directional Consistency: Ensure all turf pieces face the same direction when rolling out to avoid noticeable color variance.
- Precise Seaming: Trim the edges of the turf rolls (selvage) before applying adhesive to the seam tape for an invisible connection.
- Infill is Functional: Infill provides weight, blade support, and heat mitigation—it’s essential, not optional.
4. Strategic Hyperlink
The installation process begins long before the first shovel hits the ground. To ensure your yard is properly evaluated for things like existing drainage issues and optimal turf selection, we recommend reviewing our guide on the full turf installation process.
Explore Related Turf Resources
Related Turf Guides
- Accessible Drainage Solutions for Turf: The Key to Truly Senior-Friendly Outdoor Spaces
If you’re exploring senior-friendly turf, accessible drainage solutions for turf are just as important as the turf itself.
- Aesthetic Comparison: Turf vs. Grass (and What Actually Looks Better Long-Term)
If you’re weighing turf pros and cons, the **aesthetic differences between turf and grass** are probably at the top of your list.
- Annual Turf Care Calendar: Your Simple, Seasonal Guide to a Healthier Lawn
If you’re wondering, “What should I be doing for my lawn right now?” the answer lives inside an **annual turf care calendar**.
- Are luxury artificial turf options worth the investment for DFW homeowners?
Yes, upgrading to luxury artificial grass offers unmatched aesthetics, superior durability, and a premium feel that significantly elevates your home’s outdoor living experience and long-term value.
- Are you tired of staring at a dull, high-maintenance patch of grass?
**Yes, you can absolutely transform your yard into a stunning, functional space with a backyard landscaping makeover, and synthetic turf is often the key ingredient for DFW homeowners.**