
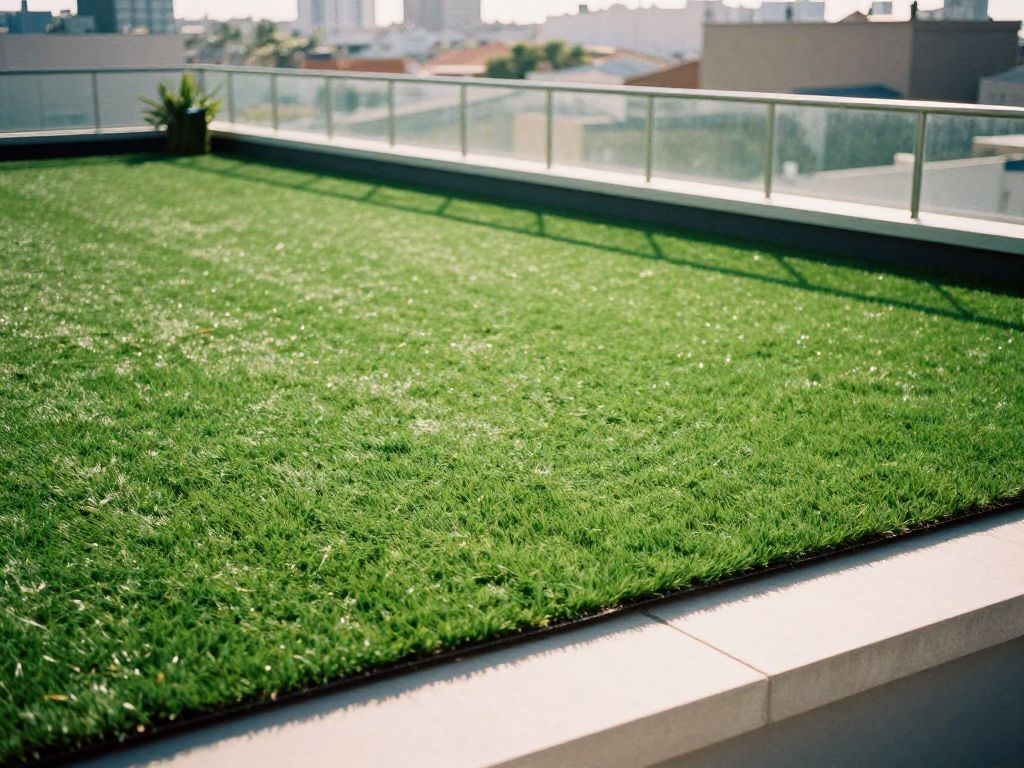
Rooftop Turf Installation Guide: How to Turn Any Roof or Patio into a Usable Green Space
If you’re searching for a rooftop turf installation guide, you’re probably wondering one core thing:
Can I actually put turf on my roof or patio safely—and have it look good, feel good, and last?
The short answer: yes, you can—as long as you plan for three essentials first:
- Weight & structure: Is your roof or patio strong enough?
- Drainage: Where does water go—and how fast?
- Layers & installation: What goes under the turf so it doesn’t wrinkle, smell, or shift?
Once those are clear, rooftop and patio turf becomes a practical way to add usable, low-maintenance outdoor space—especially in dense cities or small properties.
Below is a complete, beginner-friendly guide to help you understand how rooftop turf works, what’s involved in installing it, and the key decisions you’ll want to make before any turf goes down.
Why Rooftop & Patio Turf Is Worth Considering Right Now
Rooftop and patio turf is becoming popular not just for looks, but for lifestyle. It turns hard, unused surfaces into places you actually spend time.
- Common reasons people install rooftop or patio turf:
- No yard space, but want a “lawn” feel
- Desire for a low-maintenance outdoor area (minimal mowing, weeding, watering)
- Need for a clean, usable surface for kids, pets, or guests
- Interest in upgrading property value or curb appeal
- Wanting a more comfortable surface than concrete decks or pavers
Where rooftop or patio turf is often used:
- Apartment and condo rooftops
- Townhouse roof decks
- Single-family home flat roofs (with proper structural support)
- Balconies and patios
- Over garages or carports
- Commercial rooftop lounges or outdoor workspaces
If you’re in an urban or high-density area, rooftop turf isn’t just “nice to have”—it can be the only realistic way to create a lawn-like outdoor experience.
The Core Concept: Rooftop Turf Is About Layers, Not Just Grass
Rooftop turf isn’t simply artificial grass rolled out on a roof. It’s a layered system built to:
- Protect the roof surface
- Manage drainage
- Create a cushioned, level base
- Support long-term durability
Here’s the basic structure from the roof deck up:
- Roof membrane or surface (existing structure)
- Protection layer (if required to protect the roof)
- Drainage layer (panels, mats, or aggregate)
- Base layer (foam panels, pad, or infill system)
- Turf (the grass itself)
- Infill (material brushed into turf fibers, depending on product)
Understanding this structure is key. Every decision in your rooftop turf installation guide revolves around how to build these layers for:
- Safety
- Long-term performance
- Comfort underfoot
Step-by-Step Rooftop Turf Installation Guide
Use the steps below as a framework to understand what a proper rooftop turf installation involves.
Step 1: Confirm Structural Capacity and Roof Type
Before thinking about turf color or pile height, you need to know:
- Can my roof support the added weight?
- What type of roof surface am I working with?
Typical roof surfaces include:
- Single-ply membranes (TPO, EPDM, PVC)
- Torch-down or modified bitumen
- Concrete roof decks
- Wood or composite roof decks
Key checks to make (with a professional):
- Structural engineer or contractor review
- Maximum live load your roof can support
- Any roof warranty requirements related to adding layers or decking
This step protects both safety and warranties. Turf systems are usually lighter than traditional pavers or rooftop gardens, but they still add weight—especially when wet.
Step 2: Plan Your Rooftop Turf Drainage Strategy
On a rooftop, drainage is non‑negotiable. Water must be able to:
- Move under and through the turf system
- Find drains and scuppers easily
- Exit the roof without pooling
A proper rooftop turf installation uses a drainage layer such as:
- Perforated drainage panels
- Geocell or cup-and-channel drainage mats
- Elevated pedestals or tiles under turf tiles
These create air gaps and channels so water flows beneath the turf.
To go deeper into how drainage systems work and what options exist, you can explore a more detailed overview on rooftop turf drainage and how the right drainage layer supports every other installation step.
- Drainage planning should answer:
- Where does water currently flow and exit?
- Will turf or base layers block or change that flow?
- How will heavy rain or snowmelt be handled?
Get this right, and you avoid pooling, odors, and premature wear. Get it wrong, and issues show up quickly.
Step 3: Protect the Roof Surface
Many rooftops have waterproof membranes that can be damaged by:
- Friction
- Heavy point loads
- Sharp debris under the turf system
To avoid this, installations often include:
- A protection board or mat between the membrane and drainage layer
- A slip sheet where required by roof manufacturers
- Non-penetrating methods to anchor the turf system
The goal is to keep the system:
- Stable
- Protective
- Compatible with existing warranties
Step 4: Choose the Right Turf for Rooftops and Patios
Rooftop and patio applications have different demands than ground-level lawns.
- Important turf features to look for:
- Pile height:
- 1.25"–1.75" is common for rooftops (comfortable but not too heavy)
- Face weight:
- Moderate weights that balance realism with roof load requirements
- Backing type:
- Perforated backing to support drainage
- UV-stable backing for long-term sun exposure
- Heat considerations:
- Lighter colors or cooling yarn technologies in hot climates
Think about how the space will be used:
- Light lounging & aesthetics: Softer, taller pile can be attractive
- Pets: Shorter pile, easy to clean, and good drainage
- High traffic & events: Durable fibers and denser construction
Step 5: Design the Base Layer for Comfort and Stability
Unlike ground installations, you typically don’t add several inches of crushed rock directly on a roof.
Instead, rooftop turf usually relies on:
- Foam or shock pads for comfort and fall protection
- Interlocking tiles that combine drainage and stability
- Lightweight base systems engineered for roof applications
The base layer should:
- Feel comfortable underfoot
- Support furniture or light equipment
- Stay stable in changing temperatures
- Work with the drainage plan, not against it
Step 6: Lay and Secure the Turf
Once the base and drainage are in place, turf installation follows a similar logic to other artificial grass projects—just adapted for rooftops.
- General steps:
- Roll out turf and let it acclimate in the sun so wrinkles relax
- Plan seam locations to minimize visibility
- Cut pieces carefully to fit edges and obstacles (posts, parapets, etc.)
- Join seams using seam tape and appropriate adhesive
- Use perimeter fastening methods that don’t penetrate the roof membrane
On rooftops or patios, turf is often:
- Secured to raised edges, curbs, or frames
- Weighted with furniture or modular edging systems
- Designed so pieces can be removed for roof inspections or repairs
Step 7: Add Infill (If Needed) and Brush the Turf
Depending on the turf product and base system, you may or may not need infill.
- Why infill is sometimes used:
- Helps blades stand upright
- Adds stability and weight to resist wind uplift
- Can contribute to cushioning or cooling (with specific infills)
Common rooftop infill options:
- Rounded silica sand (in appropriate amounts)
- Specialty coated sands
- Alternative infills designed for heat reduction
After infill (if used), installers:
- Power-broom or brush the turf
- Lift fibers for a natural look
- Even out any material distribution
Step 8: Finish Edges and Transitions
Details around the edges strongly affect how the space feels and performs.
Typical edge situations:
- Turf meeting walls or parapets
- Turf meeting tile, deck boards, or pavers
- Turf at door thresholds
Good edge design should:
- Prevent tripping hazards
- Avoid allowing water to get trapped
- Keep turf from curling or lifting
- Look intentional and clean
Many systems use:
- Low-profile edging
- Hidden fasteners
- Weighted transitions where penetrations aren’t allowed
Step 9: Create a Simple Care & Maintenance Routine
Well-installed rooftop turf is low-maintenance, not no-maintenance.
- Typical upkeep includes:
- Regular debris removal
- Leaves, branches, trash
- Occasional brushing
- Keeps fibers upright and fresh-looking
- Spot cleaning
- Simple rinsing or mild cleaner for spills
- Drainage checks
- Make sure roof drains and scuppers remain clear
For pet use:
- Rinse target areas regularly
- Use turf-safe cleaners as recommended
- Ensure your drainage system supports quick drying and odor control
Again, how well your rooftop turf drains will determine how easy it is to maintain—another reason the planning in your drainage layer (see the dedicated overview on rooftop turf drainage) connects directly back to your day-to-day experience.
Key Benefits of Rooftop & Patio Turf (Beyond Looks)
When installed correctly, rooftop turf offers more than just green views.
Usability & Comfort
- Soft, comfortable surface compared to concrete or bare membrane
- Dry, mud-free area after rain
- Suitable for bare feet, kids, and lounging
Low Ongoing Maintenance
- No mowing, fertilizing, or reseeding
- Reduced water usage compared to natural grass
- Predictable upkeep instead of seasonal surprises
Lifestyle & Design Flexibility
- Defines lounge areas, play spaces, and pet zones
- Pairs well with planters, decking, and outdoor furniture
- Creates an “outdoor room” feel even in small spaces
Value Perception
- Makes small or urban properties feel larger and more functional
- Adds livable “square footage” outdoors
- Often seen as an attractive amenity in multi-family buildings
Common Mistakes to Avoid in Rooftop Turf Installation
Many problems trace back to skipping one of the fundamentals in this rooftop turf installation guide.
- Watch out for:
- Ignoring drainage
- Leads to standing water, odors, and premature wear
- Excess weight
- Overloading the structure with heavy base materials or infill
- Roof membrane damage
- Using fasteners or base systems that puncture or scuff
- Poor edge detailing
- Creates trip hazards or turf movement
- Wrong turf choice
- Overly tall, heavy, or not suited to harsh rooftop conditions
If you’re ever unsure, come back to the three core questions:
- Does it protect the roof?
- Does it drain water quickly and safely?
- Does it stay stable and comfortable over time?
Rooftop Turf vs. Patio Turf: Same Idea, Different Constraints
Rooftop and patio turf use similar concepts, but patios often have different conditions.
| Factor | Rooftop Turf | Patio / Balcony Turf |
|---|---|---|
| Primary concern | Weight + roof drainage | Surface leveling + water escape |
| Typical base | Drainage panels + foam/pad | Direct over concrete/tiles with drainage mat |
| Access | May need to lift sections for inspections | Usually easier access, smaller areas |
| Exposure | High UV, wind, and weather exposure | Often more sheltered |
The underlying concept stays the same: a layered system that balances comfort, stability, and drainage.
Rooftop Turf FAQ
| Question | Answer |
|---|---|
| Can any flat roof support rooftop turf? | No. A structural assessment is essential. The roof must be able to handle the combined weight of turf, base layers, possible infill, furniture, and people—especially when wet. |
| Do I need a separate drainage system under rooftop turf? | Yes. A dedicated drainage layer (panels or mats) is strongly recommended so water can flow beneath the turf and reach existing roof drains. For a deeper look, see the dedicated guidance on rooftop turf drainage . |
| Will rooftop turf damage my roof membrane? | It shouldn’t, if installed correctly. A protection layer is often added, and non-penetrating methods are used to secure turf and base systems. Always check compatibility with your roof warranty. |
| How hot does rooftop turf get? | Any dark surface in direct sun will warm up, including turf. Lighter turf shades, cooling yarns, shade structures, and certain infills can help reduce surface temperature. |
| Is rooftop turf safe for pets? | Yes, with the right turf and drainage. Look for good permeability, an effective drainage layer, and plan for rinsing and periodic cleaning to manage odors. |
| How long does rooftop turf last? | With quality materials and proper installation, rooftop turf can last many years, often 10+ depending on climate, usage, and maintenance routines. |
| Can rooftop turf be removed if the roof needs repair? | Yes. Many systems are designed so turf sections, tiles, or panels can be lifted to allow inspections or repairs, then reinstalled. |
| Do I need infill on rooftop turf? | Not always. Some systems rely on padding and lightweight construction. Others use modest amounts of infill for stability and appearance. The decision depends on turf specification, roof load limits, and how the space is used. |
| How do I clean rooftop turf? | Regularly remove debris, occasionally brush the fibers, and rinse as needed. For spills or pet areas, use turf-safe cleaners and ensure your drainage setup allows quick drying. |
By understanding the layered system, prioritizing drainage, and respecting structural limits, rooftop and patio turf can turn a previously unused surface into a comfortable, year-round outdoor space that fits how you live—without the upkeep of a traditional lawn.
Explore Related Turf Resources
Related Turf Guides
- Backyard Golf Ideas: How to Turn Your Yard into a Personal Putting Playground
If you’re looking for backyard golf course ideas that feel fun, low-maintenance, and actually help your game, start with this simple principle:
- Backyard Putting Green Cost Estimate
The cost of an expertly installed artificial turf putting green for a DFW home typically ranges based on size, complexity, turf quality, and necessary ground preparation. Homeowners should anticipa...
- Ball Roll Speed Optimization: The Definitive Guide to Achieving Tournament-Grade Consistency on Your Artificial Putting Green
Ball Roll Speed Optimization: The Definitive Guide to Achieving Tournament-Grade Consistency on Your Artificial Putting Green
- Best Home Chipping Practice Turf
The ideal artificial turf for a home chipping practice area is a densely packed, short-pile synthetic grass designed to replicate the tight lie of a professional fairway or fringe, ensuring clubs interact cleanly with the "ground" for consistent ball striking and realistic performance.
- Can I install artificial turf directly over a concrete patio or slab?
Yes, absolutely! Installing artificial turf over concrete is an excellent way for DFW homeowners to transform drab, hard surfaces into beautiful, soft, and functional green spaces.